Spray Paint Repair;
As a general rule, several thousand dollars are spent on this work. Depending on the type of your car and your objective, If you decide to go to a specialist workshop for this. You can save a lot of money by preparing the work at home and repainting your car with spray painting techniques.
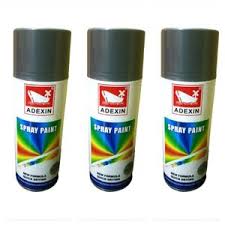
Sea Spray Paint is an easy-to-use, high-quality, and fast-drying paint that is specially formulated to offer a non-chipping colored texture that will last for years and require no maintenance.
Just as a spray gun this spray features an adjustable easy-press nozzle and a wide spray pattern for easily applying smooth and even coats on an assorted range of surfaces like metal, vinyl, plastic, fiberglass, etc.
Clean the affected area against contamination and dry with a mini clean towel
Prep the areas you don’t want the spray to touch
Shake can for 1 minute
Spray 4 inches away from the object.
For all metal sufaces Add vibrant color to car,
Stops Sticking, Binding
Repels Moisture; Conditions Rubber Seals
Long Durability and super Shinning gloss spray paint for car Scratch Repair
High Quality, Fast Drying for Interior/Exterior Use
Furniture, Bikes, Wheels
- Dries fast
- , and Squeaking
home and hobby.
- For car scratches repair.
Step 1: Clean And Prepare The Panel.
Wipe down the entire panel (door, fender, hood) you are repairing with wax and grease remover. First, wipe with a wet towel, then wipe with a dry towel.
Scuff the entire panel with a grey scuff pad with medium pressure.
Step 2: Fill And Sand Scratches.
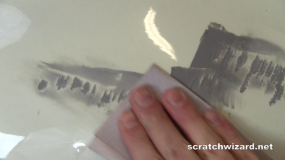
Wrap 220 grit sandpaper around a foam sanding block or your grey scuff pad and sand with firm pressure.
If you find that not all scratches will sand out, fill them with body filler. Wait 5-10 minutes for the filler to harden, then sand with 220 grit sandpaper. A heat gun can speed up the hardening of the filler.
This process may need to be repeated 2, 3, or 4 times.
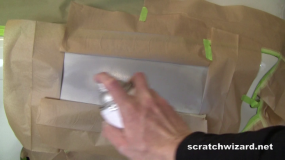
Step 3: Apply Primer.
Mask off only the areas you’ve filled and sanded. Shake your primer can for about 60 seconds. Apply multiple light coats of primer. Wait 15 – 20 minutes, then wetsand with 600 grit sandpaper.
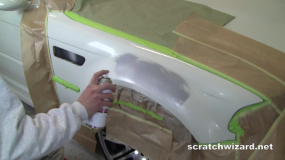
Step 4: Apply Base Coat Paint.
Mask off the area with paper and tape.
Shake the spray can for about thirty seconds. Check your spray pattern against a piece of cardboard. Apply multiple lights coats of paint, from about 10 – 12 inches away.
If you find any flaws, wait 5 minutes, and lightly sand out the flaws with 600 grit sandpaper. If you have a silver or gold car and notice “stripes”, follow up with some vertical passes.
Step 5: Apply Clear Coat Paint.
Wait at least 5 minutes after applying clear coat.
Apply multiple light coats of clear coat, overlapping each “pass” by about 50%. Wait 10 mintes, and remove your tape and paper. You are done! Wash your car, wax your car…it’s permanent.
Note: if you create a ‘run’ or other major flaw in your clear coat simply wait 24 hours, sand out the flaw with 600 grit sandpaper, then re-apply clear coat.
-
Spray paint Repair
Spray paint repair: Repainting your car is a challenge. That’s why spray painting your car is a good idea.
As a general rule, several thousand dollars are spent on this work. Depending on the type of your car and your objective, If you decide to go to a specialist workshop for this. You can save a lot of money by preparing the work at home and repainting your car with spray painting techniques.
$20.00 – $25.00